3D Modelling

What is 3D Modelling?
3D Modelling is the process of developing graphics and images that appear to have three dimensions.
This processes involves connecting a set of points with various geometric data such as lines and curved surfaces with the main goal in mind of creating a wireframe model that represents a 3 dimensional object. You can observe 3 models in videogames, movies and other things such as in medicine and engineering.
To make a 3D model you need specialised software and some knowledge on coding. There are 4 main modelling methods, polygonal, primitive, non-uniform rational B-spline, or splines and patches. In college we are using the polygonal method, this method uses triangles and quads, quads are best to use as they ensure your mesh has a clean topology (net) and that your model will deform properly when it is eventually animated. Any shape with more than 5 sides is called an N-gon, this should be avoided at all times, because it creates problems when rendering, texturing and especially when it comes to animating because the topology is a mess and doesn't react in the way a neat model should.
When creating a model or scene, you should consider you polygonal budget, you should set a limit on how many polygons you can use because the more you have, the more unnecessary memory it takes up, it will take a lot longer to render and it increases your chance of N-gons. Some game engines (such as Unreal Engine 4) won't be able to process the model properly if there are too many polygons as it will take too long to load and people just won't play the games, and the team who produced the game could lose money. In industry the usually set rough limits to avoid coming across problems like this, game studios set around 10k for models in real-time games (main characters) and around 2-4k for enemies depending on how important they are. The same goes for environments, the best thing to do is "bake" a high poly mesh onto a low one to reduce the amount of polygons but keeping the detail.
A polygon, is any two dimensional shape with multiple sides connected at vertices to enclose the shape. Shapes such as squares, triangles, pentagons and hexagons are all considered polygons, but there are many more as well.
An edge, is a component of a polygon, it helps define the shape of a model and is made up of two vertices at their end points joined by a line.
A vertex is a singular point in a 3D space, it is basically a corner of an object. It is usually invisible in "object mode".
A face is the highest level of structure in a mesh. The faces are the actual surface of the object, and they are what you see when you render the mesh. A face is defined as the area between either three of four vertices, with an edge on every side. Triangles are always best to use because they are easy to calculate and always flat. Four sided faces only work well if the face is pretty much flat like in a cube, otherwise the software splits them into two triangle anyway.
Level Design
Level design consists of, concept art, sketches, physical models and rendering. A level editor may be distributed as a complete stand-alone package, at times rivalling commercial 3D modelling software. There are many steps involved when laying out a map and these can vary dramatically across different game genres.
General steps include:
Laying out the large-scale features of the map, such as hills, cities, rooms, tunnels, etc. for players and enemies to move around in
Determining environmental conditions and "ground rules" such as day/night, weather, scoring systems, allowable weapons or gameplay types, time limits, and starting resources.
Specifying certain regions where certain game-play activities or behaviours occur, such as resource harvesting, base building, water travelling.
Specifying non-static parts of a level, such as doors, keys and buttons with associated mechanisms, teleporters, hidden passageways.
Specifying locations of various entities, such as player units, enemies, monster spawn points, ladders, coins, resource nodes, weapons, save points etc.
Specifying the start and exit locations for one or more players.
Adding aesthetic details such as level-specific graphic textures, sounds, animation, lighting and music.
Introducing scripted event locations, where certain actions by the player can trigger specified changes.
Placing pathfinding nodes that non-player characters take as they walk around, the actions they will take in response to specific triggers, and any dialog they might have with the player.
When creating a level, you will usually have a mod-pack of about 6-8 pieces which you will use to piece together your entire level, but by texturing them differently, you can make a whole road of buildings look different.
Rendering
When it comes to showcasing your models, animation and environments, you need to render them to make them look more professional because it is the final process of creating the actual 2D image or animation from the prepared scene. Rendering can sometimes be compared to taking a photo or filming a scene after the set up in real life has been completed. There are many different types of rendering, these can range from non-realistic wireframe rendering through polygonal-based rendering, to more advanced techniques like: ray tracing, radiosity or scanline.
The most common types of rendering are real- time and non real-time.
Real-time rendering is used in interactive media, such as video games and simulations. In this type or rendering, the main objective is to show as much information as possible as the eye can process, in a fraction of a second. This is to achieve the highest possible degree of photorealism at an acceptable minimum rendering speed. Rendering software can simulate visual effects such as lens flares, depth of field and motion blur. These try to simulate the optical characteristics of cameras and of the human eye.
Non real-time rendering is used in non interactive media such as, feature films and and video, these are rendered much more slowly. Non real-time rendering allows leverage of limited processing power to obtain a higher quality image. Rendering times for individual frames can vary a lot from a few seconds to a few days for complex scenes. The rendered frames are then displayed sequentially at high frame rates (24, 25 or 30 fps) to achieve the illusion of movement.
References:
http://www.wisegeek.com/what-is-3d-modeling.htm
http://blog.digitaltutors.com/modeling-with-quads-or-triangles/
http://animation.about.com/od/glossaryofterms/g/What-Is-A-3d-Polygon.htm
http://wiki.blender.org/index.php/Doc:2.4/Manual/Modeling/Meshes/Mesh_Structures
https://en.wikipedia.org/wiki/3D_rendering
Tools used so far in maya

Extrude The extrude tool creates new geometry from the selected component of an object already made. The selected component can be vertices, edges or faces, the mostly commonly used is the faces. To use the extrude tool, you select the faces you want to extrude, go to "edit mesh" and click extrude, you will then have three arrows appear on the selected area (blue green and red) depending on which arrow you pull, it will pull out the selected area it that direction.
Edge Loop The edge loop tool lets you insert one or more edge loops across an object (polygon mesh). When you insert an edge loop, you are splitting the polygon faces that are either side of the selected edge ring. It's useful for when you want to add more detail into an object or just need more vertices to target weld two objects together.
Target Weld The target weld tool lets you merge vertices or edges to create a shared edge or vertex between them, you can only do this once you have combined to two object meshes
Bend Deformer The bend deformer tool lets you bend any deformable object along a circular arc. The bend deformers include handles that let you control the extent and curvature of the bending effects.
References:
http://knowledge.autodesk.com/support/maya/learn-explore/caas/CloudHelp/cloudhelp/2016/ENU/Maya/files/GUID-557246DD-CF0F-4BDB-BDD0-47947A97BC94-htm.html
My crate and oil drum scene
|
Whilst I was creating this simple scene I learned how to use simple tools such as, the Edge Loop tool, Duplicate tool, Resize tool and the Extrude tool. It was quite an easy scene to make and I didn't really struggle with any of it. I did try and have a go at texturing by myself on the oil drums by following some videos on Youtube, I couldn't quite work out how to get the textures to wrap correctly around the objects, but I did manage to put a nice blue shine on the to make them look like they're made of metal.
|

This is a small screenshot of my Oil Drum and Crate scene.
|
My pipe model
|
This is the pipe model I created, I found most things easy to make, it just took a very long time to create and target weld everything together. I used similar tools in this model as the oil drum and crate scene, except in this one, I used the Target Weld tool and the Combine tool lots more. I tried hard with this scene to make it look as professional as possible by trying to target weld as evenly as possible, but I think it lacks detail when I look back on it, which I could easily sort out if need be.
|

My Pipe model.
|
My metal walkway
|
The hardest part about the metal walkway, was target welding the pipes together that were slanted, it meant deleting a lot of both pipes that were merging, and it then became harder for me to target weld them together so they looked neat. I think my overall model looks very similar to the image we got given, so I am proud in that sense, but I think it could be better once I get more used to the tools I need to use. One other thing I didn't do was use the Mirror Tool, instead I just duplicated certain parts and rotated them, so I just need to practice using the Mirror Tool now, so it can be used in the future.
|

My Metal Walkway model
|
How to bake in maya
|
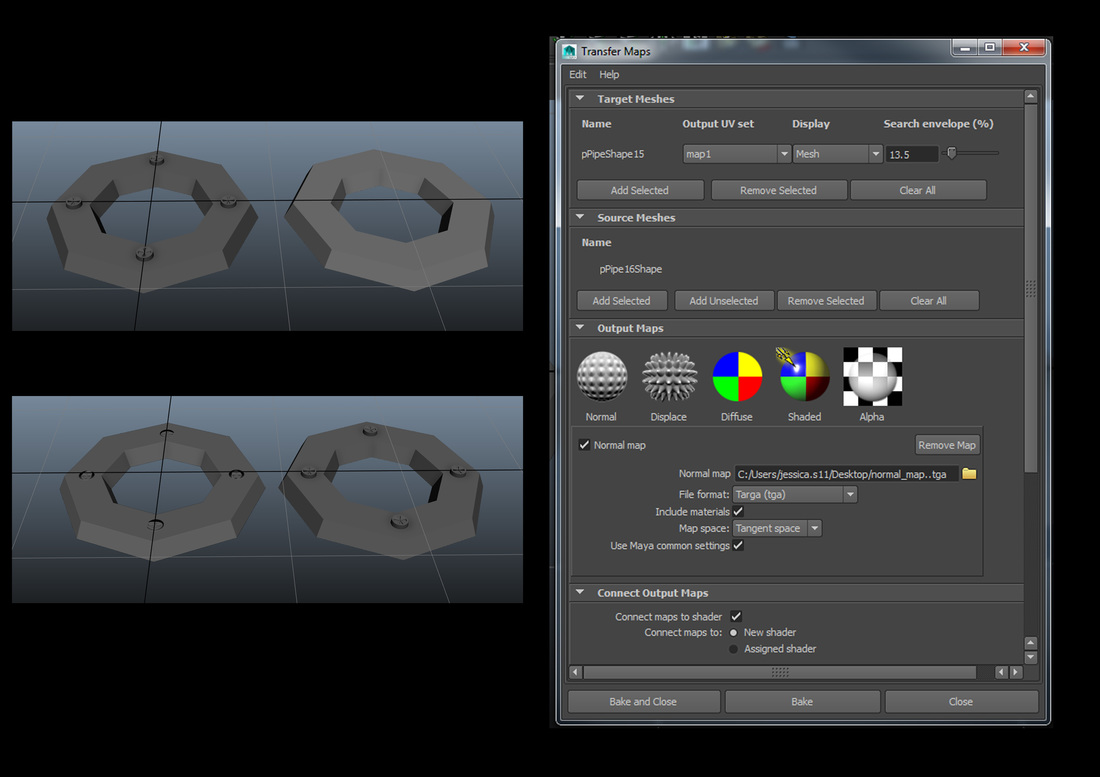
This is what I baked on Maya, I struggled to make it look professional as it didn't go 100% right which I'm annoyed with as the screws are slightly warped. This could've happened when I was sorting out the size of the envelope but I tried changing it and making it bigger, but it still didn't work. Nevertheless, I still did the baking process correct, and these three pictures show the steps I went through. First I had my high resolution model with the screws and also my low resolution model which doesn't contain any screws. I then placed them directly on top of each other and selected the low resolution model. I then went to transfer maps and set all the options correctly (as seen in the box to the right). I then pressed "Bake" and waited, once it was done I moved the high resolution model out of the way and was left with the low resolution model with the map of the high one on it.
As I said I'm not happy with the final outcome but I have managed to bake it, hopefully I can get the hang of it soon. |
|
Pipes mod-pack Research
|
I did some research on Pinterest and found parts of pipes I'm going to create for my mod-pack. I've decided to pick this valve because I like the way it looks, it seems quite simple and shouldn't take too long to make. I am going to make the valve first as even though it looks simple, it still might take a while to get it as accurate as I'd like, plus making the pipes really shouldn't take that long. This object will also be quite high poly.
|

Image off Pinterest
|
The next piece I'm going to create is the cross piece. The I'll do this second because it will take a while to get the target welding even, and I want to make sure I have enough time to make it look good instead of possibly having to rush it near the end.
|
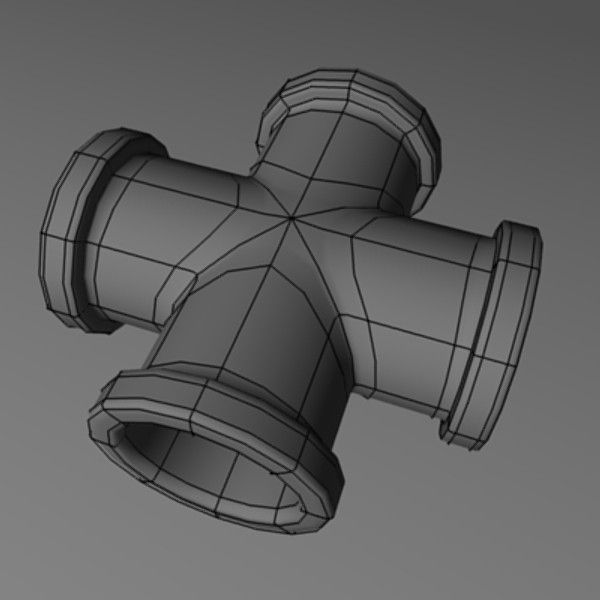
Image off Pinterest
|
|
The other pieces I'm going to create are a right angle piece, a long thick pipe, a long thin pipe and possibly and 180 degree pipe. I will make these pieces last because they will be simple to create so won't take as long as the other pieces.
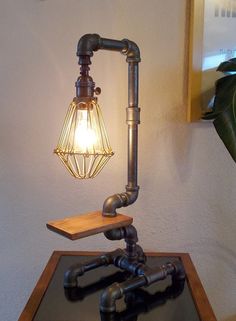
Image off Pinterest
|

Image off Pinterest
|
My finished mod pack & pipe scene
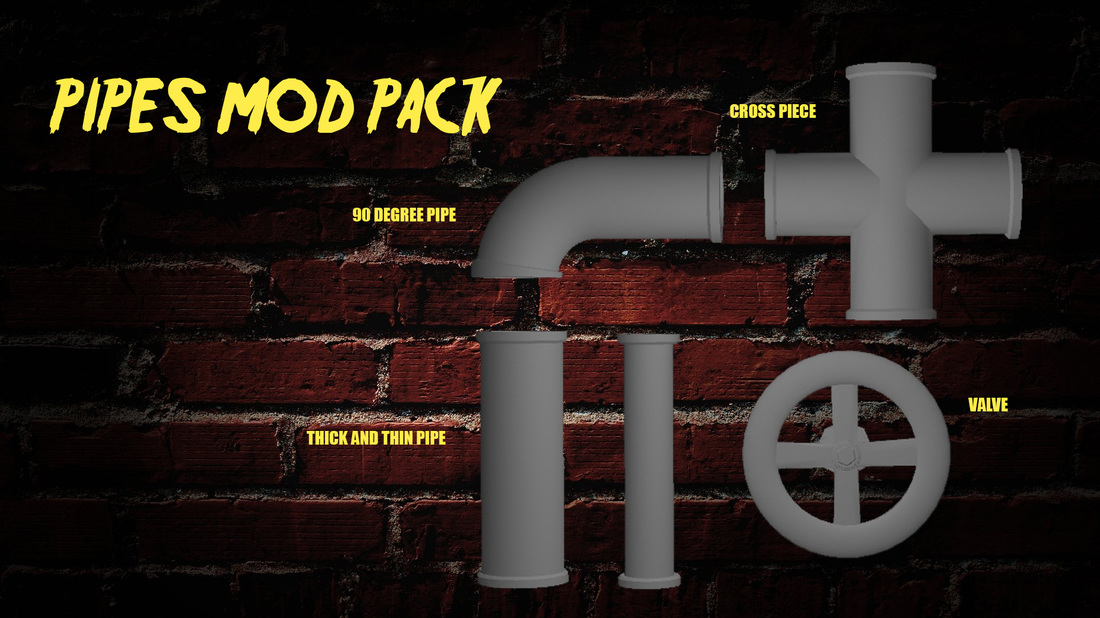
This is the Mod pack I created on Maya presented on an A3 sheet on Photoshop, I've just tried to present my work as professionally as possible so people will take time to appreciate the effort actually gone into making the models. The models may look simple, but I had a lot of trouble whilst trying to make them as the program kept braking the models for some reason, I haven't found out the reason why, but I'm just really glad I managed to finish the models to a decent presentable standard.
|
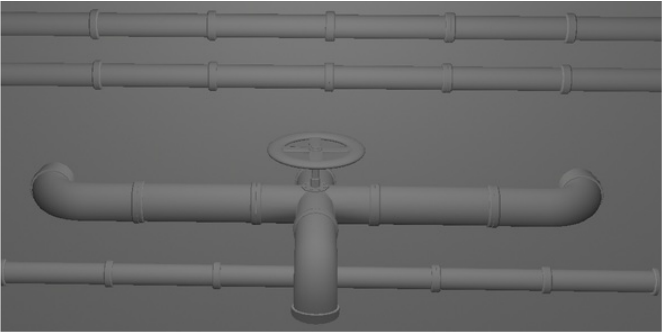
Here are my models together in a scene, I've decided to make a tap out of all my parts and I'm quite happy with how it turned out, I like how neat and professional it looks here. One thing I could do to improve the scene would to make a thin,90 degree pipe so I could involve the regular thin pipes more and make the design a bit more intricate. Overall I'm happy with what the model actually looks like though. |
|
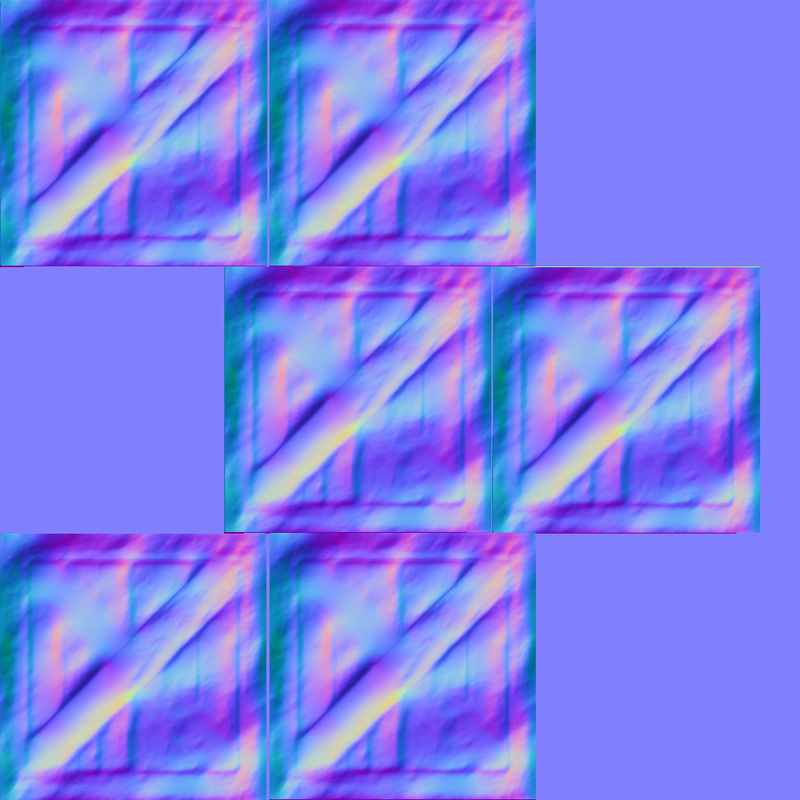
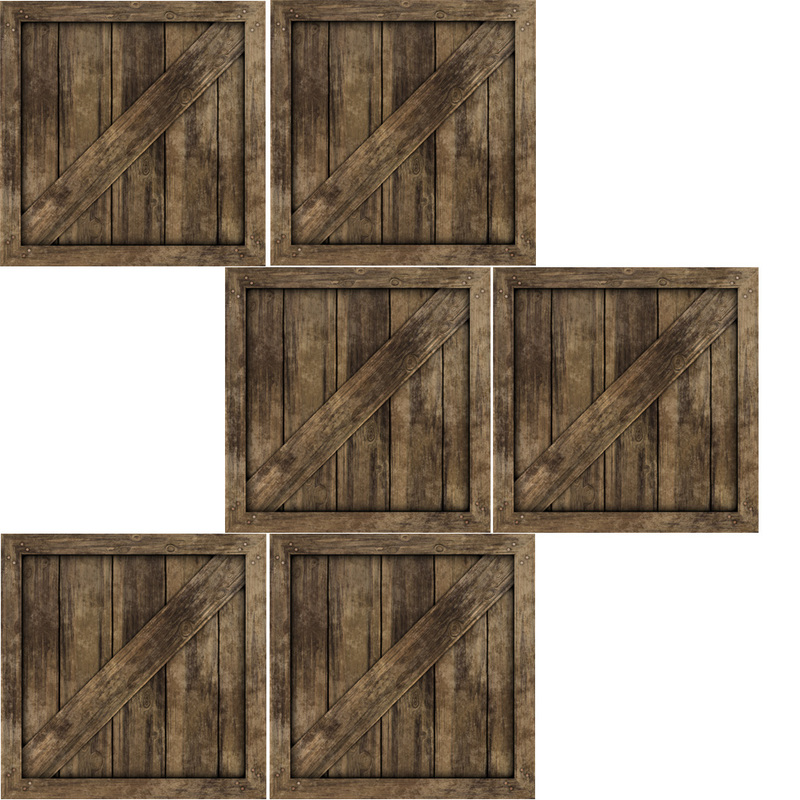
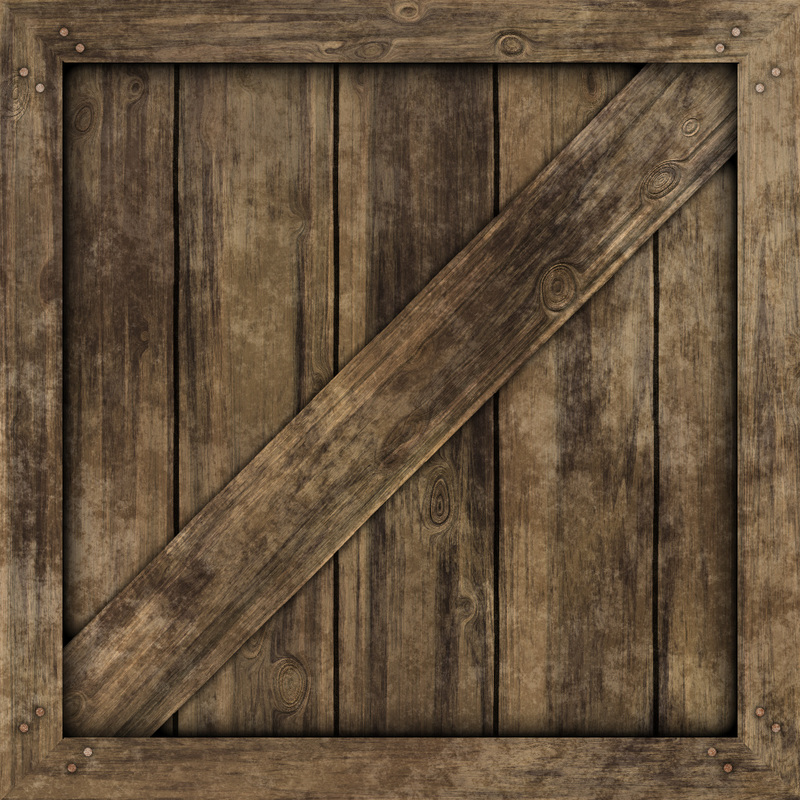
Crate with bump map and texture
|

|