Digital Graphics
Development Log
Assignment 1 - Develop my Photoshop skills in order to produce the required work in the next two assignments.
- Follow the workshops and document my process on this development log.
Assignment 2 - Using my developing skills in Photoshop, and the concept from the Splash damage brief.
- I must produce at least 2 orthographic projections of models. (Can include entire building)
- Use mood boards to enhance the appearance with research I have done into materials and details to do this.
- Research layouts and presentation.
Assignment 3 - Produce a rendering of the Character or Splash Damage building concept.
- Use the silhouettes and mood boards as my starting point.
- Work up an orthographic projection of the character/building.
- Then produce black and white thumbnail sketches and rough sketches, which explore colour and a final rendering in
colour of my final design in perspective.
Final Deadline - 06/06/2016
Orthographics

Orthographic Projection
Creation process
1. Draw the front view of your object, in this case, a cup and saucer.
2. Draw the vertical lines and horizontal lines to create the boundaries for the other views (top and side) so the projection is all kept in proportion.
3. Draw the top view following the guide lines, you have just drawn.
4. Draw a 45 degree dotted line from the top right corner of the front projection.
5. Extend the lines from the top projection right, until the reach the diagonal line, and then as they cross the line, draw them directly down so the side projection has an accurate boundary from the top, and front of the cup and saucers.
6. Draw the side projection to fit the boundaries you've just created.
(Steps are slightly different to the ones in the image)
These two examples of orthographic projections are my own. One of a mug, and the other of the Splash Damage building.

|

|
These two orthographic projections are only very basic, so my next move is to create 2 more detailed projections, one of the building again but with my style added to it, and another one, possibly of my character or some street furniture I'm going to include into my scene.

|

|
My Perspective render
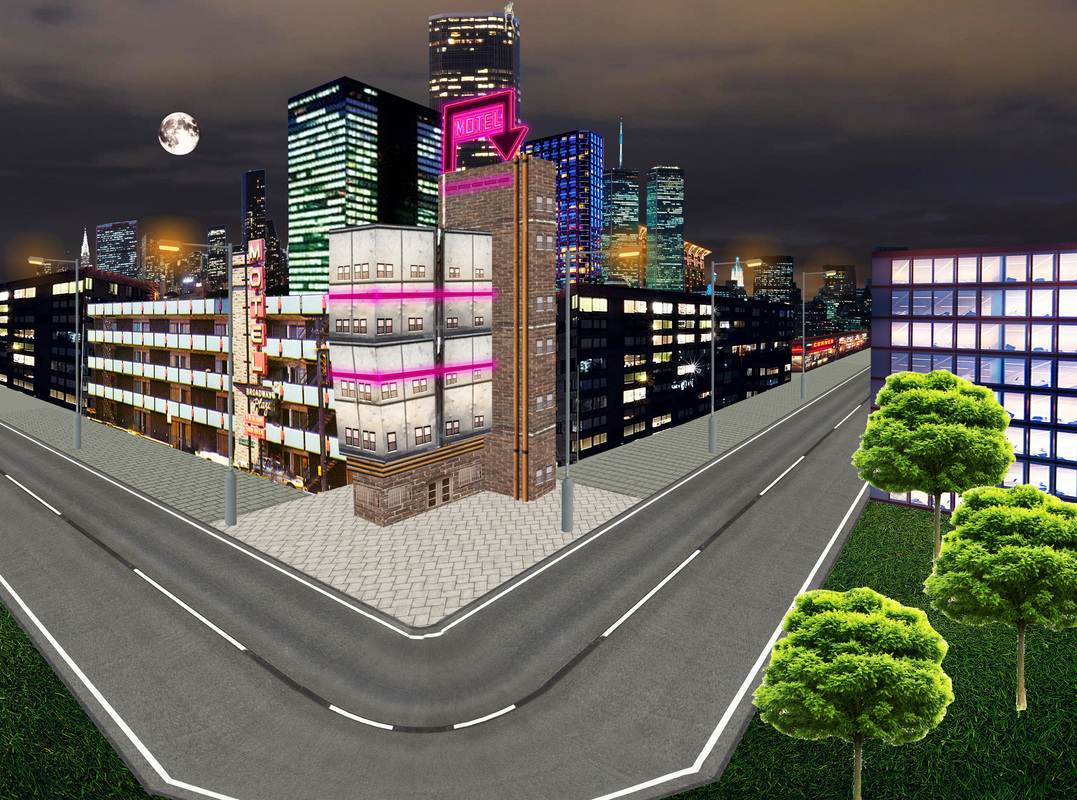
|
Photoshop Tools
UI overview Here, will just be what certain tools do, and useful shortcuts for Photoshop. Rather than me writing out all of the buttons, I have a picture instead, as it saves me time and has everything I need. I also have a couple of images on how to set up a page below.
|

|


Pen Tool Examples
These are two images I created with the Pen Tool to get used to the tool. I'm quite happy with how they turned out, as you can tell what they are, and they look nice and neat.

|

|
How to use layers effectively
To use your layers effectively, make sure you name every single layer. This helps you, and anybody who is also involved in the project distinguish which layers are which, so they can complete the work faster, rather than trying to find each separate layer first which wastes time, and in the industry, money.
How to make custom brushes
|
1. Create a new file 2. Draw out the pattern you want your custom brush to look like. 3. Select the pattern you have just created. 4. Go to "edit" and click "define brush preset" 5. Name your brush and press okay 6. Go to brushes, and your new brush should be at the very bottom. |

|
How to use the Selection Tools
Marquee
The most basic selection tool in Photoshop: the Marquee Tool. With it, you can draw a box or circle to select a portion of your canvas.
Single Row/Column
Though you can switch to them directly via the keyboard, hidden in the submenu of the Marquee Tool are the Single Row and Single Column Marquee Tools.
Modification Shortcuts
These tools follow a standard that you’ll find repeated across the entire line of Adobe desktop publishing apps. When you hold "shift", the shape will be constrained to perfect proportions (a perfect circle or square). Holding "Alt" will allow you to start the shape from the center rather than the top left. Combining the two, will give you a proportional shape that grows from the center. Finally, it’s extremely useful to know that you can actually move the selection around while you’re still in the process of creating it. Simply hold "space" and you can reposition the in-process selection.
Additional Options
When you’re using the Marquee Tools, there will be a strip of options above the canvas. These allow you create precisely sized selections, feather your selection and change the default behaviour of the next selection action (add to, take away, etc.). The latter of these options can also be accomplished with your keyboard: Shift adds to a selection, Option subtracts, and Shift+Option intersects.
Lasso
Slightly more complex than the Marquee Tools are the Lasso Tools, which give you much more freedom over the shape of your selection. There are three variations of the Lasso Tool: the Default Lasso Tool, Polygonal Lasso Tool and Magnetic Lasso Tool, which can be quickly cycled through via the “L” key.
Lasso Tool
The Lasso Tool is 100% freeform. Simply grab it and start drawing with your mouse or trackpad to make a selection. However, the result tends to be quite sloppy.
Polygonal Lasso Tool
The Polygonal Lasso Tool allows you to click from point to point to gradually build a selection. Selections made with this tool are purely comprised of straight edges. If you don’t mind some tedious clicking, you can pull off a primitive curve, but for the most part you’ll definitely want to stick to hard edges.
Combining the Two
It’s pretty rare to find an area that can be selected with only straight lines. Fortunately, you can combine the use of the Lasso Tool and Polygonal Lasso Tool in one fluid workflow. Grab the Lasso Tool and hold down Option to draw straight lines with the Polygonal Lasso. Then, once you hit a curve, let off of Option and you’ll have the freeform Lasso. Once you’re done with the curve, hold down Option again to go back to making straight lines.
Magnetic Lasso Tool
The Magnetic Lasso Tool is a lot like a cross between the Polygonal Lasso Tool and the Magic Wand Tool. It allows you to build your selection incrementally, but in a fairly automatic fashion. Simply move your mouse along an edge and the MLT will give its best guess for outlining that edge. You can let the tool build your points automatically or manually click if there’s a specific point that you think needs to be dropped.
Magic Wand
This is a tool that is primarily used by users who are new to Photoshop, or don't know how to use other selection methods. Refine Edge is a new aspect that's been added to the magic wand and it is very good at repairing a poor selection. Everyone knows how to use this tool: click on an area and Photoshop will attempt to select that area based on color and contrast. The results are rarely as good as you want them to be but if you have truly solid colour fields then it can work decently.
Settings
The key to using the Magic Wand Tool effectively (apart from using Refine Edge) is to familiarize yourself with the settings. Three of these are particularly important: Tolerance, Contiguous, and Sample All Layers.
The tolerance allows you to control the sensitivity of the color selection criteria. A higher tolerance will select more of the image, a lower tolerance will select less. Think of this setting as telling the accuracy with which Photoshop will match the pixel that you click on.
By default, the magic wand will make a selection of similar pixels that are actually connected to each other. In other words, only one area will be selected.
Deselecting the “Contiguous” checkbox will cause the Magic Wand to ignore connections and instead select any pixels on the canvas that are close in colour to the one that you clicked on while keeping your tolerance settings in mind. A non-contiguous Magic Wand Selection is very similar to a Colour Range selection.
The last option allows you to choose whether the Magic Wand takes all layers into consideration or only the one that is currently selected.
Pen Tool
To be accurate, the tool is specifically for creating paths, which can then easily be converted to selections.
The Pen Tool is difficult to master but once you really get the hang of it, there’s simply nothing that feels as accurate or flexible. The strength of the Pen Tool lies in creating smooth curves. These are hard to freehand and obviously impossible with the Polygonal Lasso.
So why not just use the Quick Selection Tool? There are many reasons. First of all, you can be far more precise and intentional in your selection with the Pen Tool. Further, Pen Tool paths are vector and are therefore incredibly versatile, allowing for endless editing and scaling at any time. Also keep in mind that your eye can sense an edge much better than software so when there’s a lack of clear contrast, the Pen Tool will prove superior. Finally, paths can be saved with even flat files and therefore represent the best way to embed a selection into a file that doesn't retain layers.
|
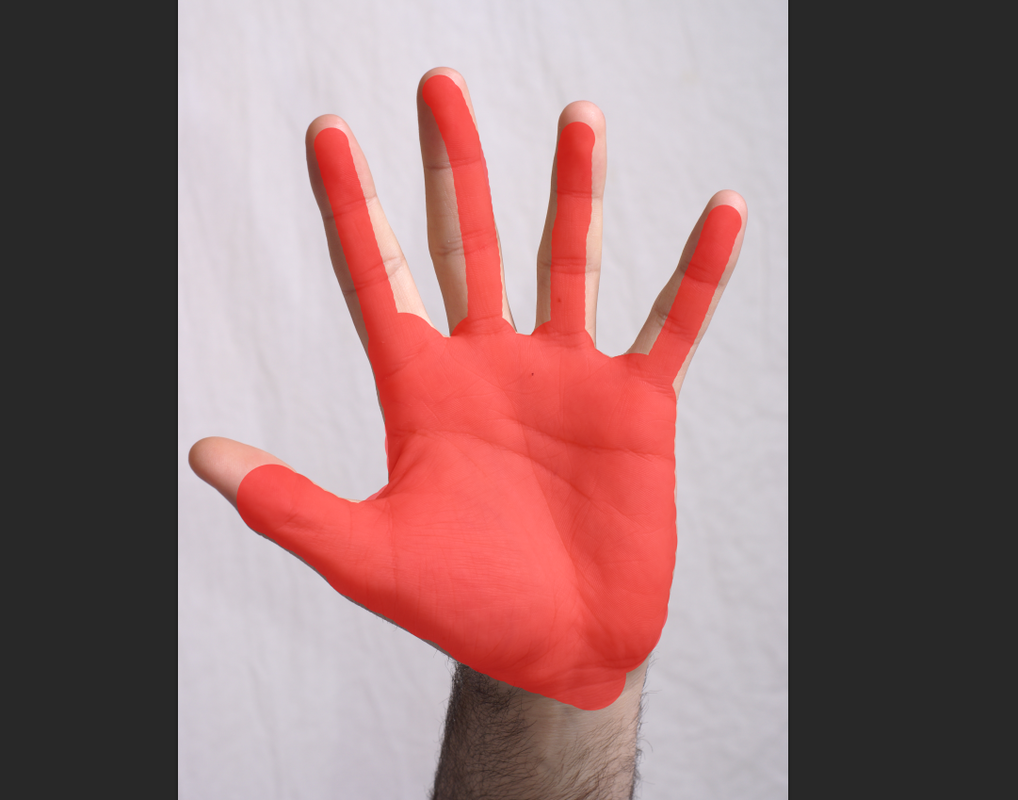
Quick Masking
Using this tool allows you to create your own mask on a picture, or it will allow you to add to a selection already made by one of the other tools. To edit or create your selection from scratch, you click on the quick mask button which is located under the colour swatches on the left hand side. Once clicked, if you already have a selection, it should turn red (this could be inverted). To add to the selection to made you need to use the brush tool and colour in the other areas you also want selected, and if you make a mistake, you can just use the erase tool and get rid of it. If you are starting the quick mask from scratch, it's exactly the same except when you first click the quick mask button, the picture will look like nothing has changed until you start using the brush tool, and then you will see the red lines. to conform the selection, you just click the quick mask button again and it should work, you can then cut the image out or do whatever you need to do with that selection. |

|
Various Composition rules
In pairs, we had to create images using the 4 different composition rules and these are what me and my partner created.
|
Dynamic
Dynamic composition uses many diagonal lines. The diagonal lines make the image seem slightly unsettling, which results in a sense of movement, energy and excitement that comes from dynamic composition. That's why it's perfect in this image, it really captures the volcano erupting well, and makes you almost feel as if it's still erupting. |

|
|
Iconic
Iconic sets the focal point directly in the center of the picture. It is mostly used for character-based pictures, but can be used for other means and makes the center more desirable.(e.g the moon and the mountain peak). Golden Section
The Golden ratio is a special number that is found by dividing a line into two parts, so that the longer part, divided by the smaller part, is also equal to the whole length divided by the longer part. It' looks like this as an equation : a/b = (a+b)/a = 1.6180339887498948420 … The spiral itself acts as a pathway, which leads your eyes to the focal point of the image. I find this composition the most interesting of them all because of the way it leads you, and from that composition I created this image. It helps portray very well how the composition works, because first of all you don't notice the guy in the background, but because of the way the image spirals in, you are lead to it. References: http://www.livescience.com/37704-phi-golden-ratio.html Rule of Thirds
This is the most commonly used composition technique. The picture you take or draw will be segmented into 9 equal parts that are separated by two horizontal and vertical lines. You put the most important object on one of the crosses where the lines meet, (eg the man) or, along or near the vertical line of your focal point. This gives your image a more interesting touch rather than it just being centered. |


|
The basics of colour theory
|
The Colour Wheel
A colour circle, based on red, yellow and blue, is traditional in the field of art. Sir Isaac Newton developed the first circular diagram of colours in 1666. Since then, scientists and artists have studied and designed numerous variations of this concept. RGB (Red, Green Blue) Additive - Created with light On a computer, the colours we see on screen are created with light using the additive colour method, additive colour mixing begins with black and ends with white: as more colour is added, the result is lighter and tends to get whiter. CMYK Subtractive (Cyan, Magenta, Yellow, Black) - Created with ink Mixing colours in painting works in the opposite way, the subtractive colour method. Subtractive colour mixing starts with white, and as more colours are added, it gets darker and darker and ends with black. Primary Colours: Red, yellow and blue. In traditional colour theory (used in paint and pigments), primary colours are the 3 pigment colours that can not be mixed or formed by any combination of other colours. All other colours are derived from these 3 hues. Secondary Colours: Green, orange and purple. These are the colours formed by mixing the primary colours. Tertiary Colours: Yellow-orange, red-orange, red-purple, blue-purple, blue-green & yellow-green These are the colours formed by mixing a primary and a secondary colour. That's why the hue is a two word name, such as blue-green, red-violet, and yellow-orange. Three properties of colour Hue Hue is another term for colour, for example, all these colours have a blue-ish hue. Value The lightness of darkness of a colour is/can be controlled by its tints and shades. Tint: A colour mixed white white. Shade: A colour mixed with black. Tone: A colour mixed with grey. Intensity Intensity, also known as saturation is how full and bright, or dark and dull a hue is, pure hues can be mixed together to dull down or mute there intensity. Mixing complementary colours has the quickest effect on intensity. Colour schemes Colour Harmony/ Analogous Colours Harmony can be defined as a pleasing arrangement of parts. When something is not harmonious, it's either boring or chaotic. Colour harmony delivers visual interest and a sense of order. Harmony is a dynamic equilibrium. Monochromatic Colours Monochromatic is primarily one colour, with dark and light values of that specific colour. Complementary Colours Complementary colours are any two colours which are directly opposite each other on the colour wheel, such as red and green and blue and orange. These opposite colours create maximum contrast and stability. Triadic Triadic colours are any three colours that are equally spaced apart on the colour wheel. Reference: http://www.colormatters.com/color-and-design/basic-color-theory |


|
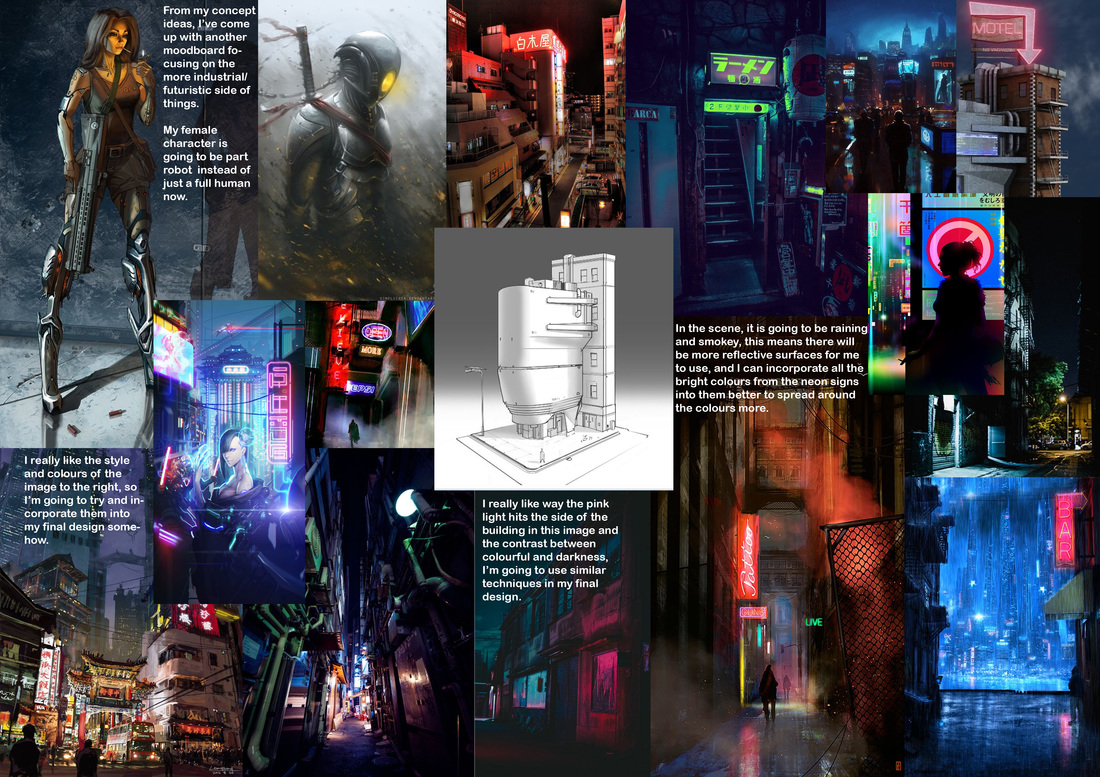
More Splash Damage work
Here is a more up-to-date moodboard for my Splash Damage scene, I've decided to go down the industrial root for my work, so here are some images I got from Pinterest and reasons why I've chosen them.